Fly.io 相比于 Vercel,可以直接运行一个 Docker 容器,还支持多区域部署,自动扩容,当然这些 Features 对于 pixman 项目来说用处不大,目前 Fly 是需要绑定信用卡来验证,我测试过使用虚拟卡和国内招行 Visa 都可以通过,没有多大难度,在免费额度内是不产生费用的,教程就不再讲怎么注册怎么验证了,非常简单。
下面直接开始部署项目,我这里是在 Ubuntu 上演示,对于其他操作系统,理论上区别不大,具体可以看 Fly 的文档。
官网的操作指南:https://fly.io/docs/hands-on/install-flyctl/ ,Linux 系统如下:
curl -L https://fly.io/install.sh | sh
使用 fly auth login 命令登录,回车之后 cli 会输出一个 URL,复制到浏览器打开授权,终端会提示登录成功
$ fly auth login
failed opening browser. Copy the url (https://fly.io/app/auth/cli/xxxx) into a browser and continue
Opening https://fly.io/app/auth/cli/xxxx ...

Waiting for session... Done
successfully logged in as [email protected]
接下来创建一个文件夹,用来保存 Fly App 的配置
mkdir fly-demo
cd fly-demo
新建一个 fly.toml 文件,根据自己需要修改
app = "pixman" # 你的应用名字
primary_region = "hkg" # 这里可以根据你的地理位置选择,完整的区域代码可以参考 https://fly.io/docs/reference/regions/#fly-io-regions
kill_signal = "SIGINT"
kill_timeout = "5s"

[experimental]
  auto_rollback = true

[build]
  image = "pixman/pixman:latest"

[[services]]
  protocol = "tcp"
  internal_port = 5000
  processes = ["app"]

  [[services.ports]]
    port = 80
    handlers = ["http"]
    force_https = true

  [[services.ports]]
    port = 443
    handlers = ["tls", "http"]

  [services.concurrency]
    type = "connections"
    hard_limit = 25
    soft_limit = 20

  [[services.tcp_checks]]
    interval = "15s"
    timeout = "2s"
    grace_period = "1s"
    restart_limit = 0

[[vm]]
  cpu_kind = 'shared'
  cpus = 1
  memory_mb = 256 # 这个配置就够了,不用太大,免得费用超了
使用 fly launch 启动
$ fly launch
An existing fly.toml file was found for app pixman
? Would you like to copy its configuration to the new app? Yes
Using build strategies '[the "pixman/pixman:latest" docker image]'. Remove [build] from fly.toml to force a rescan
Creating app in /opt/fly-demo
We're about to launch your app on Fly.io. Here's what you're getting:

Organization: Pixman                   (fly launch defaults to the personal org)
Name:         pixman                   (from your fly.toml)
Region:       Hong Kong, Hong Kong     (from your fly.toml)
App Machines: shared-cpu-1x, 256MB RAM (from your fly.toml)
Postgres:     <none>                   (not requested)
Redis:        <none>                   (not requested)
Sentry:       false                    (not requested)

? Do you want to tweak these settings before proceeding? (y/N) No
接下来耐心等待 machine 启动,完成后会显示以下内容
Created app 'pixman' in organization 'personal'
Admin URL: https://fly.io/apps/pixman
Hostname: pixman.fly.dev
Wrote config file fly.toml
Validating /opt/fly-demo/fly.toml
✓ Configuration is valid
==> Building image
Searching for image 'pixman/pixman:latest' remotely...
image found: img_rj5yv1jdyzq7vdwq

Watch your deployment at https://fly.io/apps/pixman/monitoring

Provisioning ips for pixman
  Dedicated ipv6: ..
  Shared ipv4: 0.0.0.0
  Add a dedicated ipv4 with: fly ips allocate-v4

This deployment will:
 * create 2 "app" machines

No machines in group app, launching a new machine
Creating a second machine to increase service availability
Finished launching new machines
-------
 ✔ Machine 4d891752b97d78 [app] update finished: success
-------
Checking DNS configuration for pixman.fly.dev

Visit your newly deployed app at https://pixman.fly.dev/
这里 create 2 "app" machines 的原因详见:https://community.fly.io/t/increasing-apps-v2-availability/12357,当然你也可以在 dashboard 或者使用命令删除备用机器。
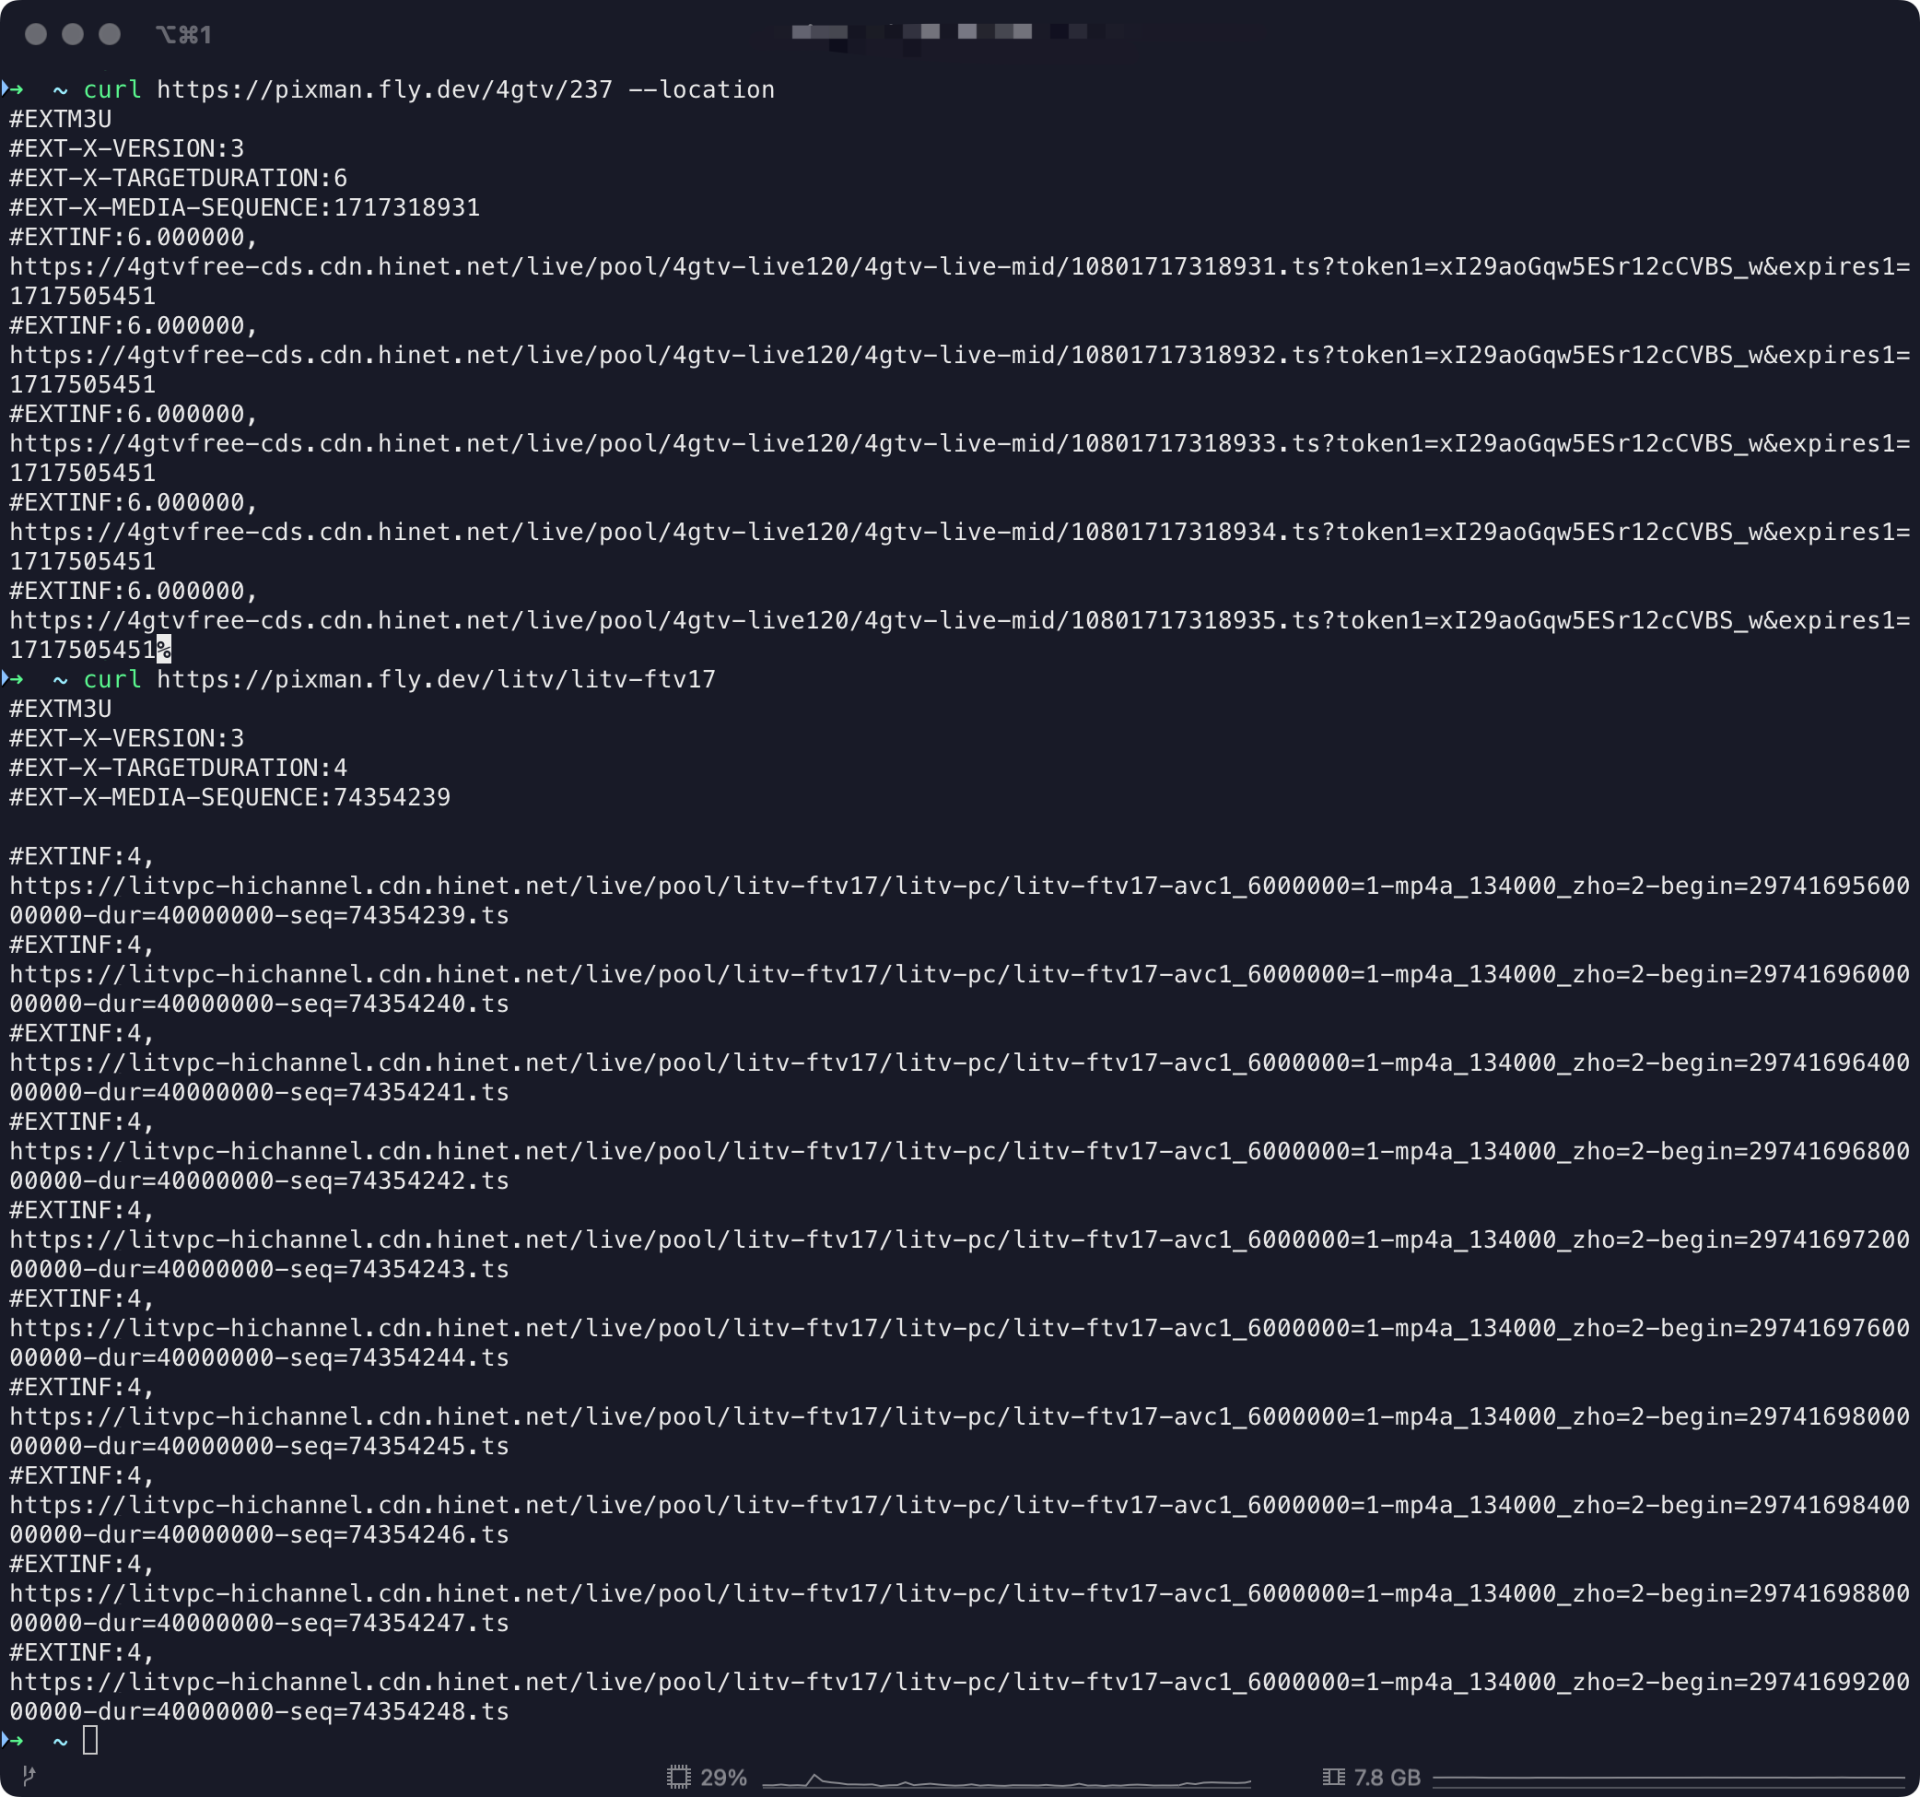
到这里就算启动成功了,访问 https://{APP_NAME}.fly.dev/4gtv.m3u 来测试是否可用。
浏览器打开 https://fly.io/dashboard 进入 App 管理页面,在 Certificates 页面右上角 Add a Certificate,输入你自己的域名,按照网页指示添加好 DNS 解析,如果你的域名托管在 Cloudflare,不建议打开代理模式。
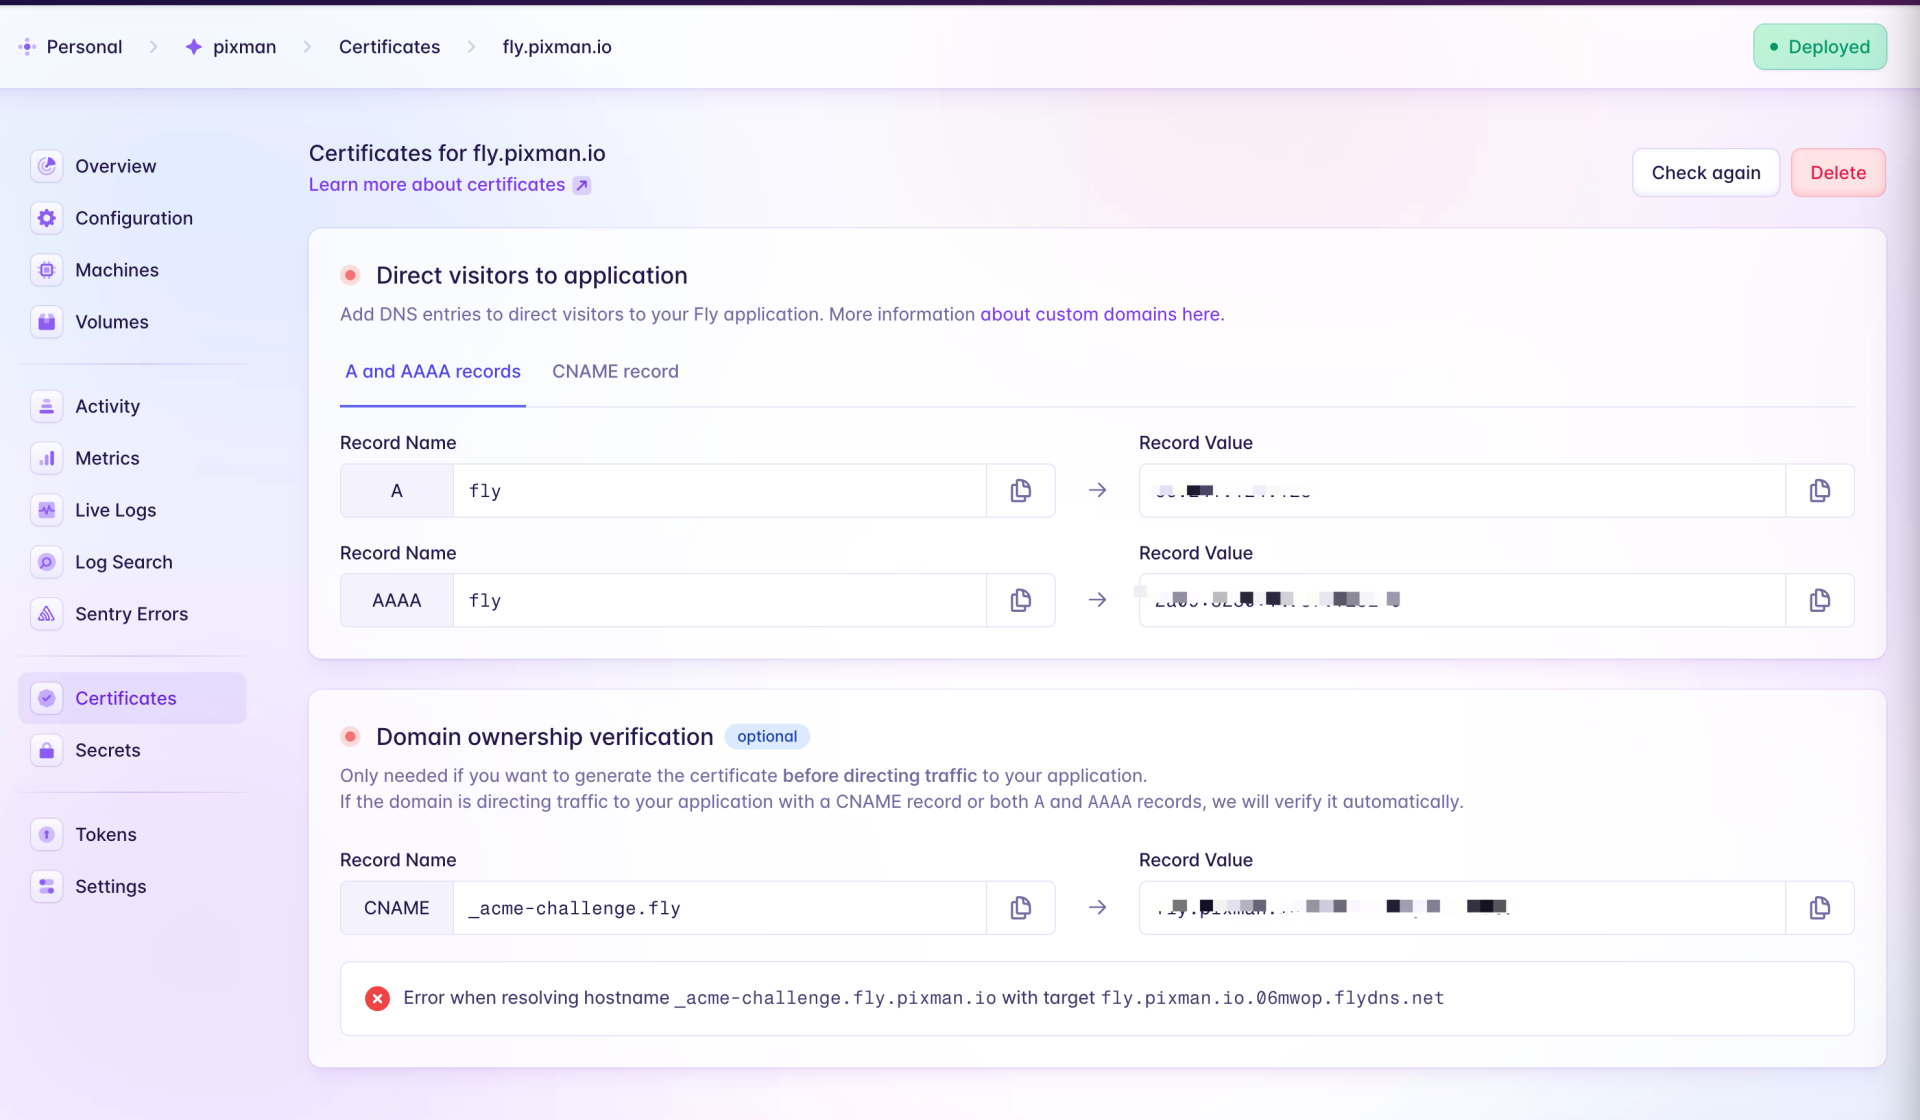
配置好 DNS 之后,使用自己的域名来访问服务,并且自带 SSL 证书
如果 pixman 发布了新版本,你需要使用命令重新部署,流程如下
# 在你最初创建的目录下操作
fly status
fly deploy --remote-only
fly apps destroy APP_NAME
Ps: 教程写完后我就会删除我的 App,不要访问教程中的演示域名。